

For the most part, I have loved everything I've grown in my garden. In fact, because I'm adding new things every year, but not subtracting anything, my garden keeps getting bigger and bigger and taking over every inch of the backyard - leaving less space to walk, or polka, or whatever it is that non-gardeners do in their gardens. Do they have clam bakes? Is that still a thing? I don't know, because I don't have room for such shenanigans. It's a good problem to have.
Last year, I grew chard for the first time. It has since become one of my favorite things to eat - and I'm including ice cream and cookies in that pool of eligible candidates. Chard wins every time. It's green gold as far as I'm concerned.
 |
| Chard - safe from leaf miners, but not from me. |
Having become enamored with chard at the beginning of the growing season last year, I was horrified when my entire patch of chard was attacked by leaf miners (undoubtedly unleashed by the gnomes in retaliation for my installation of four new patio boxes).
Leaf miners are nasty little insects that feast on the inside layers of your plants' leaves, leaving a trail of their feces behind them. Inside the leaves. No one wants that on their dinner plate. It's gross. I'm getting the heebie jeebies now just thinking about it. If you want to read a little more about leaf miners and see some photos, be sure to visit Episode 10: Wherein Organigirl Introduces You to A Common Enemy of Beets and Chard - The Leafminer.
This year I've solved the problem before it even started by building a hoop house over the chard bed. It's quick and easy, and, by covering the finished hoop house with a lightweight row cover fabric, pretty much the Fort Knox of the organic vegetable growing world. If you live in an area where leaf miners are a threat to your chard, spinach, or beet greens, a simple hoop house with row cover should be your first line of defense, and is likely to be the only defense you need - so set those pesticides down!
Necessary Supplies (for one 4'x6' hoop house):
Six - 1' sections of 1" PVC pipe
Three - 10' sections of 1/2" PVC pipe
One - 6' section of 1/2" PVC pipe
Three - stainless steel screws
Three - stainless steel wing nuts
Six - stainless steel washers
Nine - four inch long snap clamps for 1/2" pipe
Twenty-four - steel screws that are NOT galvanized (don't used anything galvanized in vegetable beds).
60" of plastic hanger strap
Lightweight row cover fabric.
Heavy stones, wooden boards, or landscaping staples to secure your row cover fabric at the bottom edges of the hoop house.
A PVC cutting tool (if you are buying PVC in sections longer than necessary; a saw would also work but is much more labor intensive)
A drill with a bit just larger than your screws.
STEP ONE:
Cut your PVC into the appropriate lengths listed above. If your PVC is pre-cut, you get to skip this step - congratulations!
 |
| A PVC cutting tool looks like this. |
STEP TWO:
Install your six 1' sections of PVC at the four corners of your bed and at the middle of the two long sides of your bed using two pieces of hanger strap per pipe (one near the top and one near the bottom).
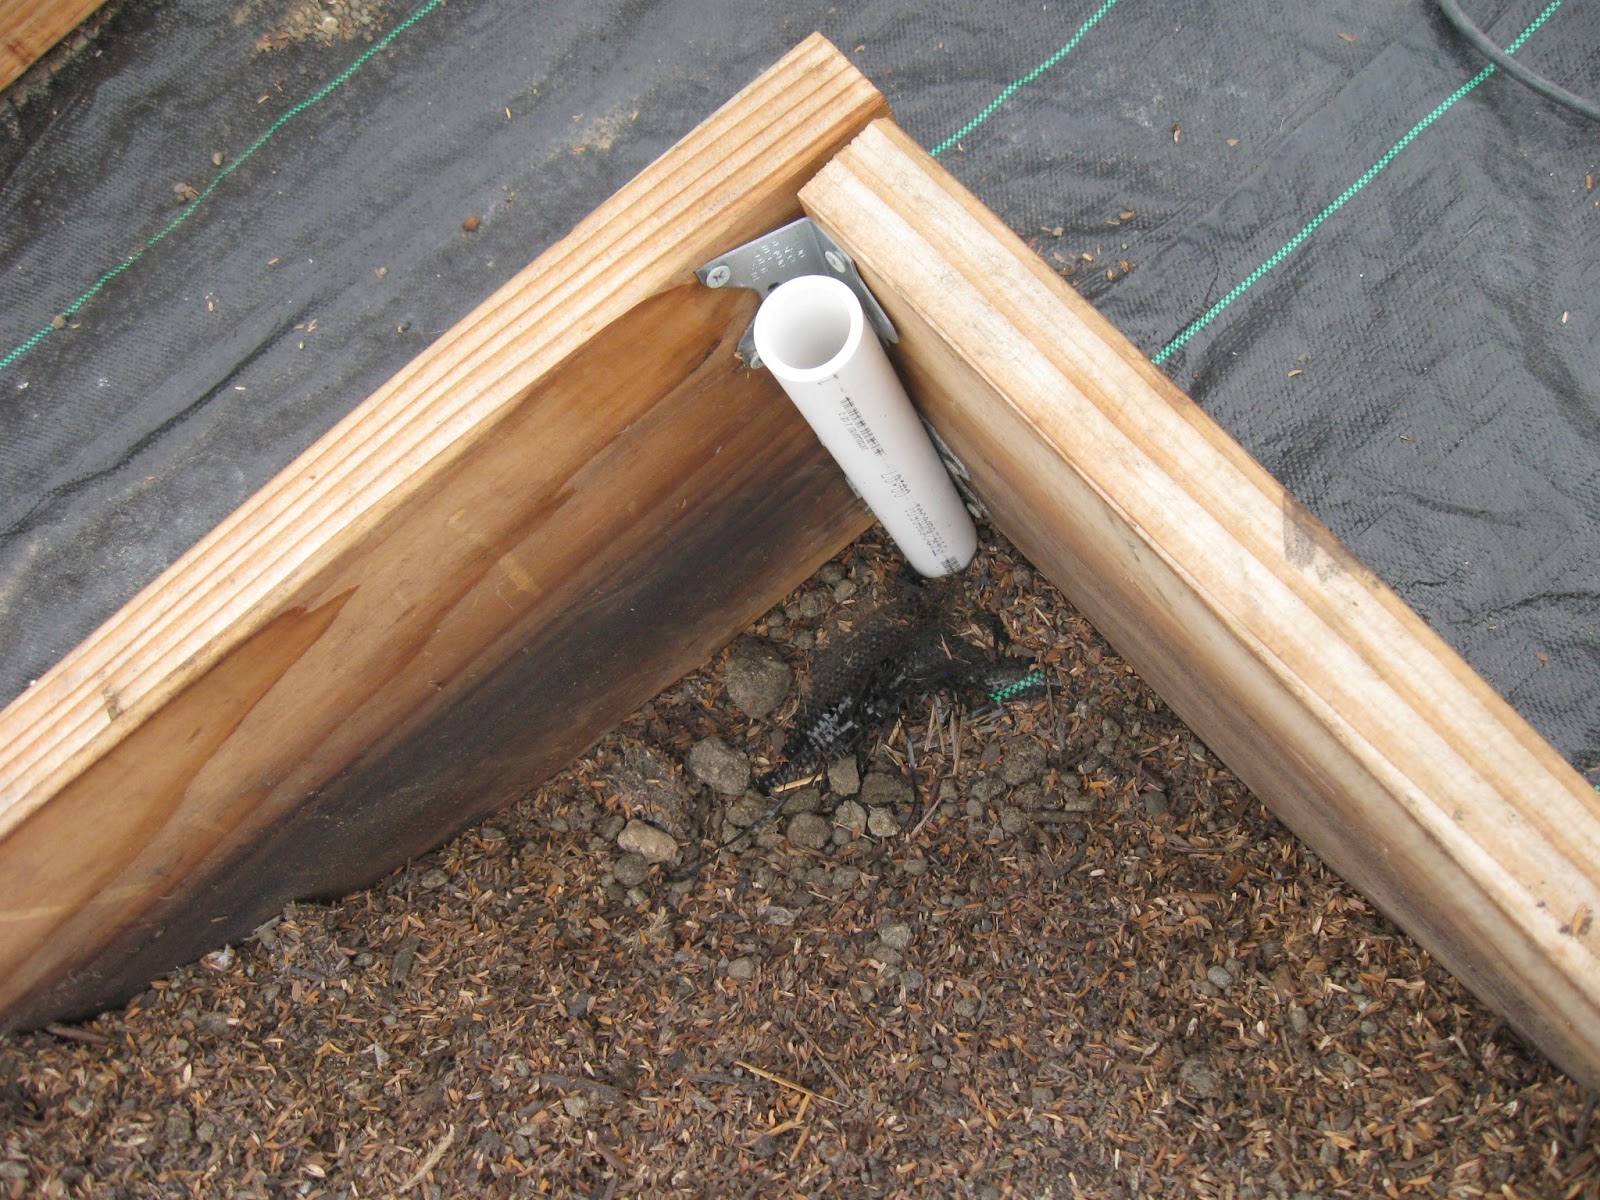 |
| The top of the pipe should be just below the edge of your raised bed. |
 |
| Those man hands aren't mine, but I'm married to them. |
 |
| This is what it should look like when you've finished installing each pipe. |
STEP THREE:
Drill three (six) holes through your 6' piece of 1/2" PVC. Each hole needs to go straight through from one side of the pipe to the other (so technically you'll end up with six holes, but we're drilling three times). One of the three holes should be in the very center of your pipe and each of the other two should be about 3/4" from each end of the pipe.
STEP FOUR:
Drill one (two) holes through the very center of each of your 10' pieces of PVC. Just like in step three, drill in one side of the pipe and out the other, so technically you're making two holes in each pipe.
STEP FIVE:
Lay out your 6' piece of pipe and match up the center hole of each 10' piece of pipe to a hole on the 6' piece. Then, use a screw, two washers, and a wing nut to attach your 10' pieces to the 6' pieces where the holes match up. Make sure to have a washer in direct contact with each side of your PVC pipe at each place of attachment to prevent the screw and wing nut from digging into the pipe and damaging it.
 |
| A screw, two washers, and a wing nut. |
 |
| The hoop house frame all screwed together. |
 |
| This is why you need to drill your holes straight through both sides of your pipes. The screw needs to go all the way through both pipes. The pipes should be sandwiched between two washers with a wing nut at the top (which will actually become the bottom). |
STEP SIX:
Push the ends of each of your three 10' sections of PVC into the 1 foot sections of 1" PVC that you've attached to your raised bed box. You're now done with the frame of your hoop house.
 |
| It's easiest if you push all three of the pipes on one side of the frame in first. |
 |
| Here's the finished frame. Now where did I put that row cover fabric?... |
STEP SEVEN:
Cover your hoop house frame with your lightweight row cover fabric, and attach it securely to the hoop house frame using your snap clamps. Be sure to secure the bottom edges of the fabric using either large rocks (my preference since they're easy to move and last forever), wooden boards, or landscaping staples.
 |
| We put the row cover on in a hurry - it arrived in the mail just before we left on vacation. Sure, I could make it look better, but I lack the motivation to fix it because we're constantly getting in and out of it to pick chard. |
You're finished! As a final note of caution, it's best to put up the hoop house BEFORE you plant your crops. By doing so, you reduce the chance of any insects finding your veggies before you can protect them. Then they would just be trapped in your hoop house with a supply of food, and, if they had any friends with them, - well, one thing leads to another and pretty soon they start multiplying (ask your mother if you need some clarification here...) and it's goodbye chard! No one wants that. Especially your mother. She'll be proud to see you eating chard, and beets, and spinach, and so will I.
No comments:
Post a Comment